
To record harmonies with yourself, record your lead vocal first, then work out each harmony part separately — usually a third or a fifth above or below the melody — and record each one on its own track while listening to the lead. Match the lead’s phrasing and timing closely, keep harmony parts a little quieter, and pan them to give the vocal width.
Doing your own harmonies is one of the most satisfying parts of recording at home. It can also be one of the most frustrating, because singing a part that isn’t the melody, with no one beside you, takes some practice. Here’s a workflow that makes it manageable.
Harmonies vs doubling vs backing vocals
These three get confused, and they do different jobs:
- Doubling: singing the same melody again on a second track, to make the vocal thicker. Songsmith covers this in how vocal doubling enhances recordings.
- Harmonies: singing different notes that fit with the melody, so you hear two or more pitches at once.
- Backing vocals: a broader term for any supporting vocal — harmonies, “oohs,” responses, or doubled lines.
This guide is about harmonies: the different notes.
Before you record: plan your harmony parts
Choose where harmonies go
Harmonies have more impact when they’re used deliberately. Common spots:
- the chorus, to lift it above the verses;
- the hook or title line, to make it stand out;
- the last chorus, to build at the end;
- a single word or phrase you want to emphasize.
Mark these on your lyric sheet so you know what you’re recording.
Find the notes
The simplest harmonies follow the melody at a fixed distance:
- A third above is the most common. It sits close to the melody and sounds sweet.
- A third below sounds warmer and darker.
- A fifth above sounds more open and strong.
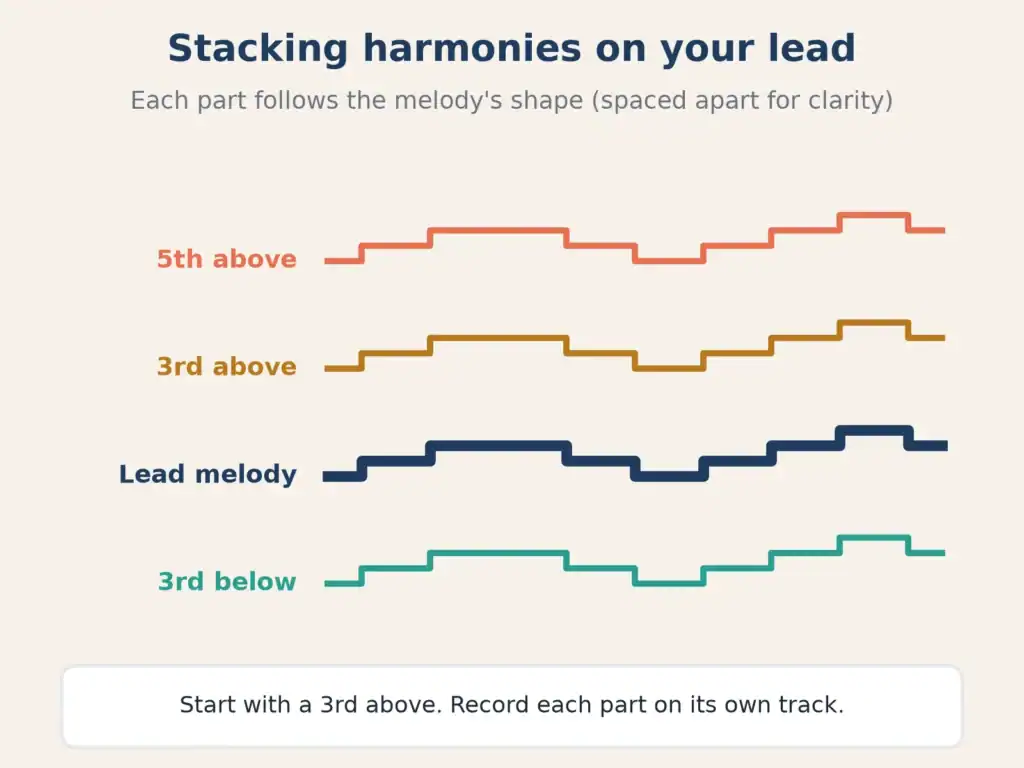
You don’t need theory to find these. Play the melody on an instrument, then try playing two notes higher in the scale for each note. Sing along and adjust any note that sounds wrong — harmony lines sometimes need to move differently from the melody to stay in key.
Practise the part before recording
Sing the harmony against the lead several times before you hit record. If you keep drifting back to the melody (everyone does at first):
- turn the lead down in your headphones;
- play the harmony notes on an instrument while you sing them;
- sing the harmony alone first, then with the lead.
How to record harmony vocals, step by step
1. Record a strong lead first
Every harmony is built on the lead, so lock it in before you start. If you’re still on a scratch vocal, record the final lead first — harmonies sung against a scratch often have to be redone.
2. Set up a separate track for each harmony
One part per track. Name them clearly: “HARM 3rd UP — Chorus,” “HARM 5th — Chorus.”
3. Adjust your headphone mix
You need to hear the lead clearly, but not so loudly that it pulls you onto the melody. Many singers like the lead in both ears at a moderate level, with a little of their own voice turned up. Songsmith’s guide to headphones for the recording artist covers monitoring in more detail.
4. Match the lead’s phrasing
This matters more than anything else. Start words together, end them together, and pay special attention to:
- consonants at the ends of words (“s,” “t,” “d”);
- breaths, which should land in the same places;
- vowel shapes, so the voices blend.
5. Sing a little softer than the lead
Harmonies usually sound best when they support rather than compete. Back off a touch from the mic, or sing with slightly less push.
6. Record a few takes and choose
Record two or three passes of each harmony, then pick the best — or punch in to fix one line rather than re-singing the whole part.
Stacking and blending your harmonies
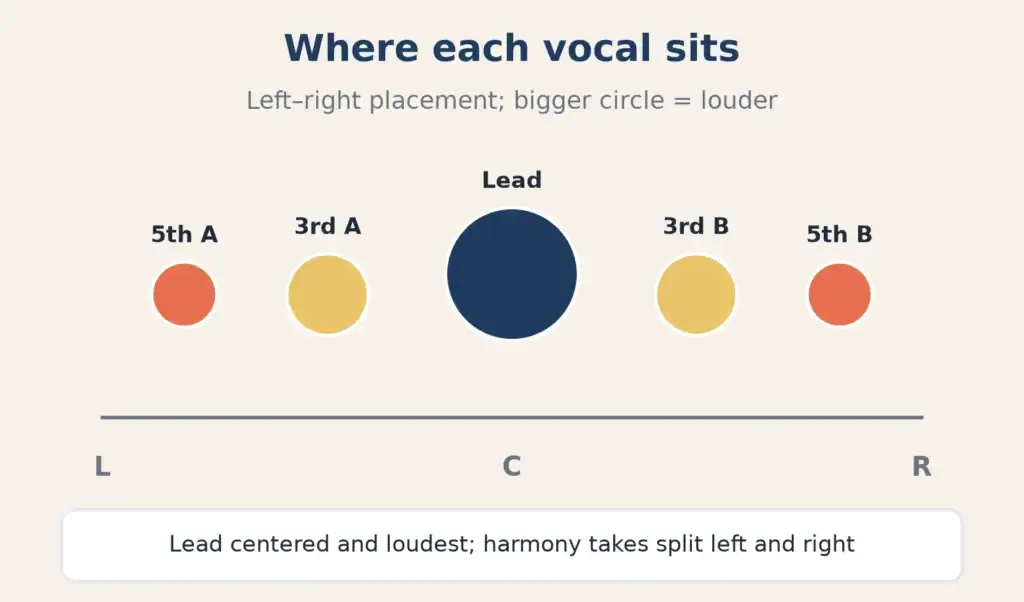
- Double the harmonies if you want a fuller sound: sing each harmony part twice and pan the two takes apart.
- Pan for width. A common approach is the lead in the center, with harmonies to either side.
- Keep them lower in level than the lead. If you can clearly hear the harmony as its own melody, it’s probably too loud.
- Trim the edges. Tidy any harmony word that starts early or hangs on after the lead.
Check the blend in a rough mix before you move on, so you know whether a part needs re-recording.
Common problems (and fixes)
| Problem | Likely fix |
|---|---|
| Keep sliding back onto the melody | Turn the lead down; practise with an instrument playing the harmony |
| Harmony sounds out of tune with the lead | Check the note choice first; then work on pitch |
| Voices don’t blend | Match vowel shapes and sing softer |
| Words don’t line up | Re-record or edit the starts and ends to the lead |
| Harmonies sound thin | Double each harmony part |
FAQ
How do you record harmonies with yourself?
Record your lead vocal first, work out each harmony note by note, then record each harmony on its own track while listening to the lead, matching its timing and phrasing.
What is the easiest harmony to sing?
A third above or below the melody is usually the easiest and most natural-sounding place to start.
How many harmony tracks should I record?
There’s no rule. One or two harmony parts, sometimes doubled, is plenty for most songs. Add more only if the song calls for it.
Should harmonies be louder or quieter than the lead?
Usually quieter. Harmonies support the lead; if they compete with it, the song loses focus.
What’s the difference between harmonies and doubling?
Doubling is singing the same melody again. Harmonies are different notes sung alongside the melody.