
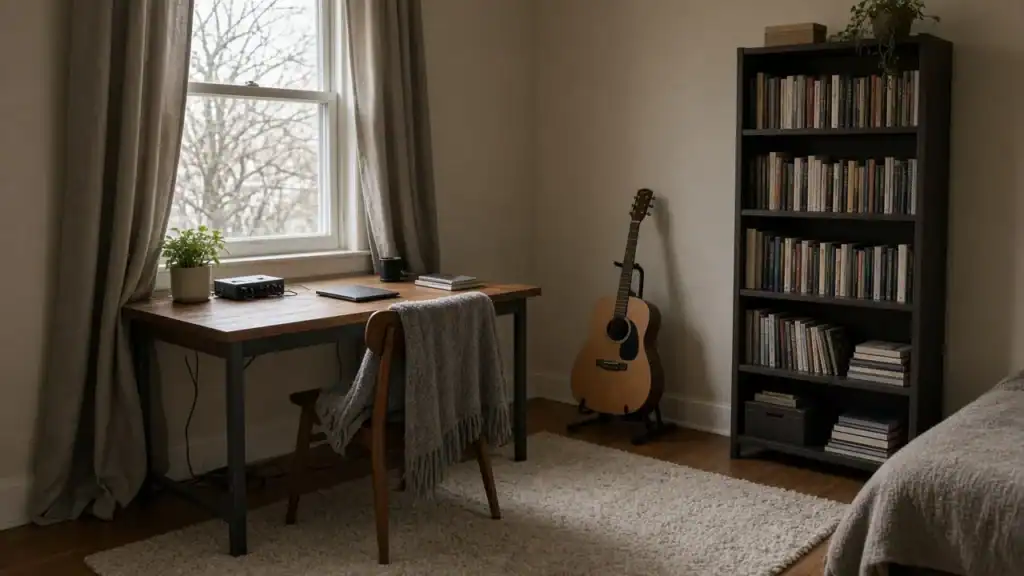
A beginner’s home studio is first a room you can work in, not a collection of gear. Before you worry about what to buy, decide where the work will happen, how the space will treat sound, and how you will sit, stand, and come back tomorrow without fighting the room.
This page is about that part of the setup: the room and the layout. It will not recommend equipment, brands, or a starter shopping list. The goal is a space that is quiet enough, honest enough, and comfortable enough that you can write, record a vocal or a work tape, and actually finish something.
Start with the room, not a shopping list
A lot of beginner advice jumps straight to what you need to buy. That is backwards. Two people can use the same modest setup and get very different results if one is working in a hard, noisy, badly placed room and the other is working in a calmer corner they have actually thought about.
The room is doing work whether you notice it or not. Hard parallel walls bounce sound around and make a recording sound boxy or boomy. A window on a busy street will write traffic into every take. A desk shoved against a corner will lie to you about bass. A space you cannot stand to sit in for an hour will quietly stop you from finishing songs.
So the first setup decisions are practical and a little unglamorous: which room, which wall, where you sit, what you do with the noise you cannot remove, and how you keep the space ready. Get those right, and whatever tools you already have will go further. Get them wrong, and no later purchase will fully save the recordings.
If you are also trying to decide when a home room is enough and when a song should leave the house, Home Recording vs a Professional Studio: How to Decide takes up that question. This article stays inside the room itself.
What should every home studio have?
Every home studio should have a few room qualities, whether the space is a spare bedroom, a corner of a living room, or a closet you only use for vocals.
A defined place to work. Not a permanent commercial room — a repeatable one. You should be able to sit in the same spot, face the same way, and start. If the “studio” has to be fully rebuilt every session, you will record less.
A way to get reasonably quiet. You cannot always have a silent house. You can choose the quietest hours, close a door, turn off a fridge if it is in the same room, and keep the desk away from a loud window. Quiet is a setup choice, not only a neighborhood accident.
A listening position that is not in a corner. Corners pile up bass and make you chase problems that are not in the song. Sit with some space behind you and on both sides if you can. Even a small move toward the middle of a wall can make the room more honest.
Softness where it helps, and honesty about what it will not do. Bare rooms ring. A rug, a full bookshelf, curtains, a couch, or a folded blanket behind you will take some of the hard bounce out of the space. You are not building a tour-grade control room. You are stopping the room from being the loudest thing on the recording.
A vocal position that is not “wherever there is a desk.” Vocals often want a different spot than the computer: a closet, a corner with clothes, or a small treated nook. That is a room decision. If you are weighing whether a booth is necessary in a small home space, the necessity of a vocal booth in your home recording studio is the right next read, and DIY vocal booth covers a practical build without turning this page into a gear list.
Cable and furniture paths that do not fight you. You should be able to sit, stand, reach a guitar, and leave without unplugging half the room. Layout is part of the studio. A tangle you have to solve before every take is a room that is not actually set up.
A door policy. People in the house should know when the room is live. A closed door, a simple sign, or a text is part of the setup. Interruptions are a sound problem and a focus problem.
Notice what is not on this list: a required rack of equipment. Tools matter — most home setups grow into a computer, an audio interface, a microphone, headphones, and eventually a pair of monitors — and other Songsmith pages cover those pieces when that is the actual question: the audio interface, choosing a microphone for vocals, headphones for the recording artist, and why studio monitors matter. For a first setup, the room’s job is to be quiet, repeatable, and kind to your ears.
How to set up a home studio in a small space
A small space can work. Many good work tapes and finished vocals have come out of bedrooms, spare corners, and rooms that also have to be something else during the day. The limitation is not square footage by itself. The limitation is usually bounce, noise, and the feeling that you are in the way of your own furniture.
Start by choosing one wall as the “front” of the studio. Put your desk or table on that wall, but not flat in a corner, and not right up against a window if the window is noisy. Leave a little space on both sides. In a rectangular room, most monitoring guides suggest facing down the length of the room — desk centered on one of the shorter walls — so the listening position sits in the front part of the room with open space behind it, rather than close to the back wall.
Give the listening position a clear “behind you.” A bed, a couch, or a bookcase behind the chair is more useful than a bare wall. If the only option is a chair against a wall, pull it forward even a foot or two so the back wall is not pressing on your ears.
Treat the easy surfaces first. A rug on a hard floor does more than most people expect. So do curtains, a closet full of clothes, and a densely filled shelf. You are trying to break up the first reflections — the slap that bounces off a nearby wall and back to you — not to silence the room completely. A dead room can feel unpleasant to sing in. A slightly softened room is the aim.
In a very small room, do not try to make one spot do every job. The desk can be for writing, listening, and editing. The vocal can happen a few feet away, facing a closet or a stack of soft furniture, even if that means standing up and moving. Walking two steps for a better vocal is a better “setup” than buying something to fix a bad corner.
Think about storage as layout, not afterthought. Guitars, stands, and notebooks need a home that is not the chair or the vocal spot. If you have to relocate a laundry basket every time you record, the room will win and the session will lose.
Shared rooms need a shutdown ritual. A small space that is also a guest room or an office should be able to return to its other life in a few minutes, and then return to being a studio just as quickly. Bins, a closed laptop, and a guitar on a stand (not on the bed) are layout choices. The faster the room can become a studio again, the more often you will use it.
Where should a home studio be?
The best room is usually the quietest room you can use regularly, not the largest room, and not the room that looks most like a studio in a photograph.
Listen to the house at the hours you will actually work. A basement can be quiet and still be boomy in the low end, with pipes and a furnace that start at the worst moment. A spare bedroom on the back of the house can be better than a big living room that faces the street. A closet may be excellent for vocals and useless as a place to sit and write. You may end up with two spots: a writing-and-listening room, and a vocal nook.
Priorities, in order:
- Noise you cannot control. Neighbor noise, street noise, HVAC, and shared walls matter more than paint color. Choose the room where those problems are smallest at your working hours.
- A door you can close. An open-plan corner can work for writing. It is a hard place to record a quiet vocal.
- Shape and surfaces. A room with some furniture and irregular surfaces will usually behave better than a bare box of the same size. Avoid rooms that are almost perfect cubes if you have another option; they can boom in an especially stubborn way.
- Comfort and access. If the “best” acoustic room is a storage cellar you hate walking into, it is not the best studio. You need a place you will actually enter after dinner.
- Neighbors and housemates. A room over a bedroom, or against a wall you share with someone else’s night shift, will limit your hours. Factor that in now.
Windows are a trade. Daylight makes a room easier to sit in, and a view can keep you working. Windows also leak noise and, if they are bare, bounce sound. If the only quiet room has a window, use it, but put heavy curtains on it and do not aim a vocal straight at the glass.
Do not pick a room because it is already “the music room” if it fails the quiet test. A guitar on the wall does not make a space a studio. A closed door and a calm hour do more.
Home studio layout ideas that actually help
Layout is the part of setup you can change this afternoon. A few patterns work in ordinary homes.
The mid-wall desk. Center the work surface on a wall, ideally one of the shorter walls so you are facing down the room’s length, with the chair pulled out from the wall behind you. Speakers, if you use them, should form a triangle with your head and should not be stuffed in a corner. If you work on headphones a lot, the same mid-wall position still helps, because the room will color what you hear when you take the headphones off.
The vocal away from the desk. Computers, fans, and hard desks are not ideal neighbors for a vocal. Face a closet, a wardrobe, or a wall with hanging clothes. Leave a little space between the singer and the soft surface so the recording does not sound muffled. A small mark on the floor — a piece of tape — keeps you at the same distance take after take.
The corner you refuse to use for listening. Corners can store cases and stands. They should not be where you sit and make mix decisions. If the only desk that fits is near a corner, angle it and pull it out so you are not sitting in the bass buildup.
The closet booth, used only when you need it. You do not have to live in a closet. You can write at the desk and step into a clothes-filled closet for the vocal. Leave the door arranged the same way each time so the sound stays consistent. This is a layout choice, and it is one of the most effective ones in a small home.
The one-way cable run. Keep power and signal cables along one edge of the desk or along a baseboard, not across the place you walk to the vocal spot. Trip hazards are session-enders. So is the habit of unplugging the wrong thing.
The unused bed as a trap, not a table. In a bedroom studio, a made bed with a blanket or two is useful softness. A bed covered in cases, laundry, and notebooks is a sign the layout has no storage. Clear the bed before you record; it is part of setting up the room.
Walk the path of a normal session in your head: sit down, listen to a reference, play a guitar, stand up, record a vocal, sit back down, listen. Every awkward move in that path is a layout problem you can fix with furniture, not with a purchase.
How the room should behave when you record
Once the furniture is in place, check the room with your ears, not with a theoretical checklist.
Clap once in the listening position and once in the vocal position. If you hear a sharp flutter — a quick ringing bounce — you need more softness or a less parallel path between hard walls. If the clap dies quickly and the room feels comfortable, you are close enough.
Talk at the volume you will sing. If the room makes your voice sound loud and harsh, you are probably close to a bare wall or a window. Turn, step back, or hang something soft. If your voice sounds dull and far away, you may be too boxed in by clothes or blankets. Back up a little.
Listen to a song you know well, at a modest volume, in the chair you will actually use. If the low end surges when you lean an inch left or right, the listening position is still fighting the room. Move the chair first; do not start chasing the recording.
Then record a short spoken sentence in the vocal spot and listen in the chair. You are listening for the room, not for a polished vocal. A little room is fine. A hallway slap, a buzzing window, or a refrigerator is not. Fix those with placement and timing before you worry about anything else.
For later stages, when a song is leaving the writing room and heading toward a mix, getting a song ready to mix is a better guide to the work itself. The room’s job is to give you recordings that are steady and unembarrassed, not to compete with a professional studio.
A beginner’s setup you can finish this week
You can do this without turning the house upside down.
Day one, choose the room using the quiet test at the hour you really work. Day two, place the desk on a sensible wall, pull the chair out of the corner, and add a rug if the floor is hard. Day three, pick a vocal position — often a closet or a soft corner — and mark it. Day four, give every instrument and cable a home, and try one complete pass of a song, from sitting down to a recorded vocal and a listen.
That is a home studio setup. It will not look like a magazine control room. It will be a place you can use. If you want encouragement on whether an ordinary person can actually finish recordings in a house like this, could any person record an album is worth reading after the room is in order.
The room will still have limits. Late-night drums may be out of the question. A difficult vocal may eventually want a different space. Those are decisions for a specific song, not reasons to delay starting. Set up the room you have, make it repeatable, and write in it.
FAQ
What should every home studio have?
A repeatable place to sit, a way to get reasonably quiet, a listening position out of the corners, some softness to tame hard bounce, a decent vocal spot, and a layout you can use without rebuilding the room each time. The room’s qualities come first.
How do I set up a home studio in a small space?
Pick one wall as the front, keep the desk out of the corners, add a rug and other soft or irregular surfaces, and give the vocal its own spot if the desk is not a good place to sing. Small rooms work when they are organized and a little softened, not when they try to be two rooms at once.
Where should a home studio be?
In the quietest room you can use often, with a door you can close, at the hours you actually work. The back bedroom often beats the impressive-looking living room that faces the street.
Do I need a vocal booth?
Not always. Many home vocals are recorded in a closet or a soft corner rather than in a built booth. Whether a booth is necessary depends on the room and the noise around it — that question is covered in more detail on Songsmith’s vocal-booth pages.
How should I lay out a bedroom studio?
Use mid-wall placement for the desk, keep the listening chair out of the corners, use the bed and curtains as softness, store cases off the work surfaces, and record vocals away from the computer if you can.
What is the first thing to do when setting up a home studio?
Choose the room and the hours, then fix placement and noise. Do not start with a shopping list. A calm, repeatable room will do more for a beginner than a pile of unopened boxes in a harsh space.