
Whether you’re assisting someone else in recording their latest song or working on your own project, capturing the best quality vocal performance is paramount. However, achieving professional-grade recordings in a home studio setting can be challenging. Before diving in, let’s take a moment to address some key considerations for obtaining a stellar vocal recording. We’ll set aside mixing techniques for another discussion and focus solely on vocal recording techniques that everyone can be proud of using.
Improving your vocal recordings at home requires a methodical approach. By following a series of steps, you can ensure that you’re doing your part to capture the best possible sound. Let’s outline these steps to help you achieve your recording goals effectively.
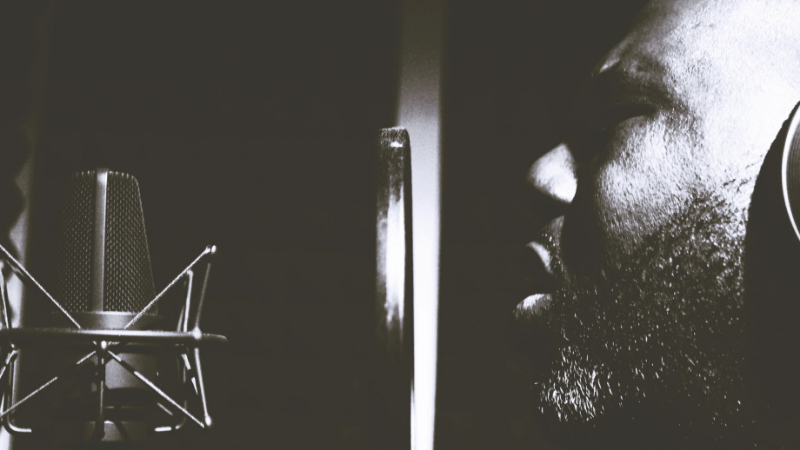
1. Use a Microphone Suited For the Vocalist
When selecting a microphone for your recording endeavors, it’s essential to recognize that not all microphones are created equal. Factors such as vocal register, tonal qualities, and intended use all play a significant role in determining the most suitable microphone for the job. Even the cost of a microphone doesn’t guarantee its compatibility with a particular vocalist.
Each microphone has its own unique characteristics, or “disposition,” making it essential to choose wisely based on individual needs. For instance, a soprano vocalist may find a different microphone more flattering than one preferred by a baritone singer, regardless of price.
If you’re recording music for others, it’s advantageous to have a selection of microphones at your disposal. Investing in a few condenser microphones and dynamic microphones ensures that you can offer your guests the most complimentary sound possible.
On the other hand, if you’re solely recording your own music, the process becomes more straightforward. Visit a music store like Mega Music Liquidator to test various microphones on your voice and choose the one that sounds best. While you might have some SM57s lying around from your band days, for proper recordings, it’s recommended to invest in a quality large-diaphragm condenser microphone at your earliest convenience. This step is crucial as it puts you in control of one of the most significant aspects of the recording process—capturing your voice accurately and favorably.
For more about choosing a perfect microphone, Read This!
2. Position the Microphone Correctly
While investing in a quality microphone is essential, its effectiveness can be undermined if the singer approaches it incorrectly. It’s crucial to communicate politely and with a positive attitude to explain to the artist the importance of proper microphone technique.
If you’re charging for your services, there’s added motivation to avoid wasting time on bad takes. As the recording engineer, you should guide the singer to position the microphone approximately three inches from their mouth. Additionally, slightly angling the microphone off-axis can help reduce the impact of plosive sounds. Plosive sounds are those produced when articulating words beginning with “P.”
Ensuring proper microphone technique doesn’t just increase the quality of the recording, It also saves time and effort for everyone involved. Here is a link to an article that goes into great detail about 4 big problems that come up when recording vocals, and how to fix them… Check it out!
3. Make Use Of a Pop Filter
A pop filter is a valuable tool. It prevents the microphone from capturing the harsh bursts of air that often accompany words starting with “P.” Additionally, it can establish a physical boundary for performers who tend to get too close to the microphone. By using a pop filter, you can properly distance your performer and the microphone without having to say anything.
Maintaining a few inches of space between the performer and the microphone is crucial to avoid proximity effect. The proximity effect can result in overloading the microphone’s diaphragm. This phenomenon happening reduces the recording quality. Vocal recording techniques like this are what can help you level up.
Pop filters are relatively inexpensive and readily available at larger music stores or online. In a pinch, you can fashion a makeshift pop filter using a hanger and pantyhose. However, if you’re working with paying clients, using pantyhose might raise concerns. For personal use or solo vocal tracking, a DIY pop filter can be great. Especially if it allows you to save money without compromising recording quality.
4. Mitigate Sound Reflections

Many people spend a lot of money to book sessions in prestigious recording studios. They don’t do it for the sake of glamour, they do because those studios are designed to be acoustically pristine. These studios adhere to precise scientific standards to achieve a near absence of sonic interference. The cost of designing and constructing such studios is substantial, and that is why they may seem to be exclusive.
On the other hand, as a home studio owner catering to independent artists may not have that kind of budget. While that may be true, one could still enhance the recording environment by improvising with readily available materials. Utilizing heavy blankets, comforters, and acoustic foam to improve sound isolation and minimize unwanted reflections. Even something as simple as converting a corner with a flipped-up futon can serve as a viable recording space.
While your setup may not rival the luxury of a professional studios, a few DIY solutions could make a big difference in the quality of your recordings. This can provide a cost-effective alternative for aspiring artists.
The most important thing is to do your best to improve your recording setup. One way to do this is by reducing the echo in your room. Here’s a simple way to go about it: when you’re in the room, clap your hands loudly. Pay attention to how much the sound bounces off the walls. Then, start adding things like blankets or a flipped-up futon to the room to soak up some of that sound. Keep testing by clapping periodically to see if the echo decreases. Keep adding stuff until the room sounds less echoey and more flat. It might not be the fanciest method, but it gets the job done without spending a ton of money on a fancy studio.
If you want some more insight on this, we have a great article that talks about whether you might need to build a vocal booth or not. Here’s the link!
5. Create an Ambiance that Nurtures Creativity and Performance
Going to a professional studio feels great because it taps into the excitement of recording in a way that being in your messy bedroom doesn’t. We’ve talked about how making demos doesn’t have to be as expensive as using top-notch studios. But that doesn’t mean we can’t tidy up a bit to help artists with a tight budget feel like champions.
Creating an organized workspace can boost the confidence of both the artist and the producer. It sets the right tone for a productive recording session. When the space is inviting and comfortable, it helps the artist feel more at ease and creative.
Taking the recording process seriously and creating a warm atmosphere can make a big difference. It helps the artist feel respected and encourages them to take their work seriously too. This can quiet that inner voice of doubt and make the whole experience more positive. While this is another one of vocal recording techiniques that may seem indirect it is important because standing on a pile of dirty laundry in a cluttered room doesn’t exactly inspire confidence, after all.
6. Support and Coach for Confidence
By showing support to the artist, you can help them bring out the best in their performance. Everyone has the potential to give a little more, but sometimes it’s hard to tap into that potential for various reasons.
Whether you’re working with a trained singer or not, or whether they’re feeling inspired or not, you’re in a partnership. Together, you’re creating something that will likely be around for a long time, accessible to anyone with a phone and the desire to listen.
It’s important to consider your own reputation and branding as you move forward. Encourage the singer to give their all in the performance, even if it means pushing themselves a bit further. This requires patience, understanding, and some mental finesse.
Just like a doctor needs a good bedside manner, you need to be supportive and encouraging to get the best performances from your artists. Building a reputation for getting great performances will lead to repeat business.
Some of these techniques may not be technical vocal recording tips, but they’re still important. Recording is a complex process with many interconnected parts, both tangible and intangible.
7. Use Closed Back Headphones to Prevent Bleed
When we record music, it’s crucial for us to hear the song so we know where we fit in. To achieve this, we typically play a mix of the song so far through headphones during the recording session.
The mix in the headphones helps the singer get inspired and stay in time with the music. However, it’s important to remember that we’re aiming for a clean recording track. We don’t want any outside noise to interfere with the recording.
Capturing outside noise on the recording can cause problems. So, instead of dealing with unwanted distractions, let’s try to prevent them or at least minimize them as much as possible.
To capture clean vocal tracks while allowing your artist to hear the song, you’ll need a good pair of professional studio headphones. It’s important to note that not all studio headphones are the same.
Look for headphones labeled as “closed-back” and choose a reputable brand. This is an area where it’s worth investing a bit more money for quality. Allocate some of your budget to upgrade to the best headphones you can afford as soon as possible.
If you’re recording in the same room as the singer, it’s essential to have a second pair of high-quality headphones for yourself. This ensures that you’re not adding extra noise that could bleed into the singer’s microphone and ruin the recording.
Here is a link to a discussion we’ve written about headphones; It should help. Click here!
8. Direct Monitoring: Beat Latency, Sing in Real-Time

When you’re recording a vocal take on your computer, another one of the important techniques is using Direct Monitoring or adjust the buffer size to reduce latency. This affects how the artist hears their voice in their headphones. If you don’t make these adjustments, the singer might hear their voice delayed or echoing back to them, which can be unsettling and distracting. It can make them lose confidence in their performance.
Luckily, this is a problem that can be easily fixed. You can adjust Direct Monitoring settings on your audio interface or in its software. For latency or buffer size adjustments, you can find these settings in the advanced settings window of your recording software (DAW). Try reducing the sample size incrementally until the playback sounds right. But be careful not to reduce it too much, as this could cause other unwanted issues with the sound. Finding the right balance is key.
9. Record Multiple Takes And Comp
Time is valuable, especially for independent artists who need to manage their own finances. To keep customers coming back and spreading the word about your services, it’s important to provide a good product while also being mindful of their budget.
One way to achieve this is by gradually working on their project instead of overwhelming them with all the costs upfront. This approach also helps if you’re working on your own project and time isn’t a pressing issue.
Here’s how it works: When the artist arrives, you motivate them and get them ready to record. You set up looping markers around the section of the song you’re focusing on and hit record. Let them perform multiple takes until you have a few options to choose from. Then, give them a break while you review the recordings to ensure you’ve captured what you need. Vocal recording techniques like this can help you build a great rapport with your clients.
If there’s still time, have them perform the section a couple more times from start to finish. Once you have enough material, you can start “comping.” This means selecting the best parts from each take to create a final composite track. This approach allows the artist to work comfortably without feeling rushed, and it gives you the flexibility to create a masterpiece at your own pace.
10. The Coffee Break Reset
This might seem like a more sneaky one of the vocal recording techniques, but it’s actually a helpful one, especially for nervous artists. Here’s how it works: You secretly keep recording while telling the artist that you’re just practicing. By framing it this way, you relieve some of the pressure they might feel to perform perfectly. This allows them to relax and sing more naturally, leading to a better performance.
Later, when they ask if you’re going to do another take, you can play it cool and say that you’re confident you got what you needed after listening back. They’ll feel good about their performance and won’t suspect a thing.
It’s best to keep this trick to yourself, though. If they catch on, it might not work as well next time.
11. Add Some Reverb to Playback

Hearing your vocals back without any effects can feel pretty awkward, like walking down the street without clothes on. It’s uncomfortable for most people, except maybe a few who don’t mind.
But adding a bit of reverb to the mix can change everything. Better techniques make the vocal recording sound more magical and can transport the artist to a grand cathedral in their imagination. This one helps them feel more confident and can lead to a better performance.
12. Record Vocal Takes Dry
While it’s nice to add a bit of reverb to the monitor mix, it’s generally not a good idea to record vocals with effects directly onto the track. You can always add effects later, but once they’re recorded, you can’t take them away. So it’s better to keep the vocals dry for now.
Some people suggest adding a little compression when recording, but be careful not to overdo it. A good preamp, however, is something worth investing in. Not having one shouldn’t stop you from recording songs, though. There’s still plenty to learn about recording without it.
When you can afford it, getting a good preamp will make your vocal recordings sound warmer and better. Until then, hold off on recording any spatial effects directly onto the track. You can always add those during mixing and adjust them as needed later on. This is certainly one of the vocal recording techniques you should keep in mind.
13. Double Tracks and Harmonies
While the artist is in the studio, after you’ve put together a good track, have them sing along with that first track. If they have the time and budget for it, it’s a good idea. You can slightly raise this doubled track in the mix to strengthen and add depth to the primary take.
It’s also a good idea to record background vocals, especially on ramps and choruses. These can be used strategically to enhance the song, but if you don’t record them, you won’t have them to use. They can really help to strengthen the overall track.
For more about doubling vocals, here is a guide!
In Conclusion
Of course, there’s always more we could talk about to enhance vocal performances and make great recordings. But you have to pick a good place to wrap things up, and this seems like a good stopping point. If you want more on about vocal recordings, This link will take you to an article about mistakes to avoid making when recording vocals. Read It!
I didn’t spend much time talking about mixing because that’s something you can explore later, after you’ve made adjustments to your recording process.
I hope some of this information is helpful to you. Remember, each step leads to the next.
So go and get to it.
Good Luck!