
Okay you’re just getting into the whole recording thing and it hasn’t been easy. There is so much to know, and be accountable for. You’d like to make a better effort of recording vocalists and you’d like to enjoy the outcome of knowing a little more about how to do so. Part of being successful is knowing how to avoid vocal recording mistakes.
No one likes to stab themselves in the foot so let’s take a few minutes and review a number of beginner vocal recording mistakes that you may have made,currently making, but should avoid.
1. Failing to Acoustically Prepare the Recording Room
When you start recording others regularly, the first question is where to position them for recording. Do you have a vocal booth? If not, where will you record them? Is it at home? If so, which room? Do you have a spare room for a control room? Will the vocalist be in the same room as you while recording? If not, where will they be?
If you’re recording professionally, it’s obvious why a bathroom wouldn’t be suitable. However, if it’s for your band, it might not matter. But you wouldn’t want to offer session time to clients and risk microphone mishaps in the bathroom.
More importantly, choose a room or area where you can adjust the acoustics for recording. In simpler terms, pick a room where you can reduce sound reflections. Reflective surfaces include counters, cabinets, furniture, and walls.
To dampen these surfaces, you’ll need soft, absorbent materials like foam, insulation, or bedding. Professional products are available, but heavy blankets, mattresses, pillows, and cushions can work if the room needs to be versatile.
Just ensure it’s done well so your clients don’t feel uncomfortable in your makeshift studio.
Recording vocals in an untreated, acoustically lively space is one of the vocal recording mistakes to avoid. It would result in unwanted echoes bouncing off the walls, which would be recorded along with the vocals, making it difficult to remove later.
Here is a link to Rockwool for soundproofing.
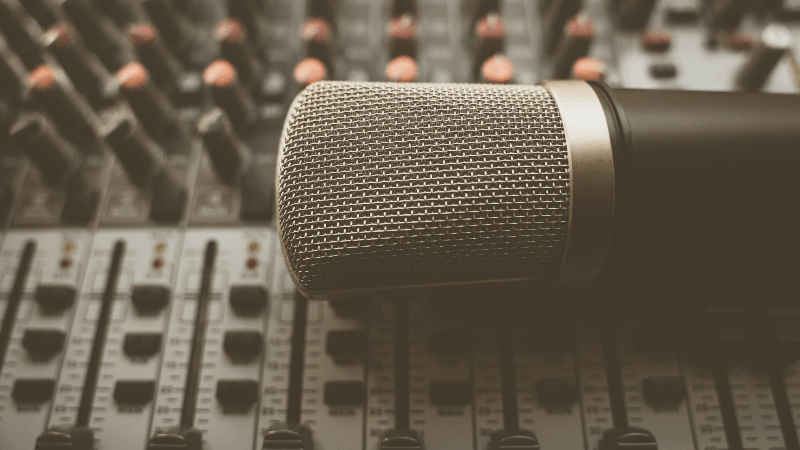
2. Using the Wrong Microphone
Using the wrong microphone for a vocal recording can mean missing out on making your recording at least satisfactory. I’m not just talking about volume, but about doing justice to the song.
Recording is an art. Like visual artists use colors to express and convey, recording engineers use their gear and tools to do the same.
Limiting a visual artist to just one color in their crayon box would be very restrictive. While they might produce great black and white prints, they’d be limited in their expression.
A “mic locker” is common in big studios. Engineers bring out different microphones, set them up, and choose the one that captures the voice best for that particular session.
Having an extensive mic locker might not be feasible for hobbyists due to cost, but it’s important to understand the purpose of having multiple microphones.
There are famous and expensive microphones, mid-range options, and entry-level ones. The point is not to debate their capabilities but to emphasize that one microphone doesn’t fit all situations.
For instance, I wouldn’t use a stage mic for recording vocals unless it was for artistic purposes. Nor would I use a Neumann U87 for my vocals.
I once had the chance to use a Neumann U87 for recording, but to my disappointment, it didn’t suit my voice. A more moderately priced AKG 414 worked better.
This illustrates that no microphone suits every situation, regardless of its cost or reputation.
It’s essential to build your mic collection gradually. Watch YouTube videos, listen to samples online, or visit music stores to test microphones.
You might not be able to buy a new mic for each customer, so start with one and collect more over time. Eventually, you’ll learn which mic suits each artist best.
For beginners, start with a large-diaphragm condenser microphone with a cardioid pattern. For more help choosing a perfect microphone, we have a great guide to help you, read it here!
3. Improper Microphone Positioning
Avoid headaches by placing the microphone in the right position relative to its source. Placing it awkwardly may not capture sound effectively, causing you to lose tone or gain in undesirable ways.
In most cases, position the boom arm of the microphone stand so that the microphone’s diaphragm is at lip level with the vocalist. Also, adjust the microphone slightly off-axis from the source to reduce plosives, which are overly powerful bursts of air produced when saying certain letters like “P.” Direct hits from these bursts can cause the diaphragm to move dramatically and be recorded, leading to the need for re-recording or punch recording to fix it.
The microphone’s diaphragm should be about 6 inches from the source, but this can be adjusted to track the desired sound or tone. Using a pop filter can help control how close the artist gets to the microphone. You can also adjust the microphone’s height to affect the tone. Moving it slightly lower toward the chest can enhance the low end, while positioning it slightly higher above the lips can increase the high end.
4. Allowing for Headphone Bleed

After reading this, there’s no excuse for having headphone bleed into your microphone. There are a few types of headphones to consider purchasing.
For recording enthusiasts, investing in a good pair of closed-back studio headphones is crucial. If you’re in the same room as the vocalist, you’ll need two sets of equal quality.
These headphones may cost a bit, but they’re not the most expensive gear in the room. Focus on finding the most effective option within your budget, rather than the most expensive or brand-name pair.
Closed-back headphones are essential for reducing headphone bleed into the microphone. They encapsulate the ear and prevent sound from leaking out of the headphones.
Open-backed headphones are used when the performer needs to hear playback while recording. However, closed-back headphones are better for preventing bleed into the microphone.
Properly worn closed-back headphones, with the earphone pads sealed around the ear, are the best way to keep the accompaniment track from being recorded along with the vocalist’s performance.
Failing to use closed-back headphones can lead to frustration during mixing, as unwanted background noise may be recorded and difficult to remove, this another one of the vocal recording mistakes to avoid.
5. Failing to Record at Proper Level
In the past, recording on tape allowed for “hot” recordings to achieve the best tone. However, in today’s digital age, we need to be careful not to record at levels that are too high, as it can cause clipping and ruin a performance.
It’s essential to evaluate the input gain properly before recording to avoid damaging an otherwise inspired performance. If the performance exceeds the headroom capacity, the waveform will be clipped, resulting in a visually distorted sound file with audible scars.
Repeatedly breaching the threshold will result in repeated clipping, making the sound file sound unnatural and hideous. This can destroy the best efforts of your artist, so it’s crucial to avoid it.
6. Failing to Use Useful Accessories
Living on the edge, let’s discuss recording without some essential accessories and the consequences.
Firstly, not using a pop filter is a big mistake. Pop filters are inexpensive tools crucial for preventing plosive bursts of air from distorting the microphone’s diaphragm. Without a pop filter, these sounds can render parts of the recording unusable.
A pop filter catches these air bursts, especially when saying words starting with “P,” effectively eliminating the problem from the recording.
Secondly, using sensitive condenser microphones requires caution. Failing to use a shock mount is a mistake as it isolates the microphone from vibrations. Any building vibrations, like mechanical noises or foot tapping, can travel through the microphone stand and affect the recording.
A shock mount acts as a barrier, suspending the microphone away from vibration sources, ensuring a cleaner recording. If you want to avoid making vocal recording mistakes, use one.
7. Failing to Select ‘Direct Monitoring’
When recording a vocalist for the first time, they’re relying on you to guide them through the process. It can be intimidating to put on headphones and stand in front of a microphone, especially for someone new to the studio environment.
Imagine the nerves when you’re waiting for your cue, start singing, and suddenly everything sounds terrible in your headphones because of a delay. As a new singer in the studio, you may not know how to handle this situation and try to power through, but it becomes impossible to find your vocal path.
Feeling frustrated and embarrassed, you start questioning the engineer about whether this is normal. It’s uncomfortable to question anyone, but you can’t be expected to sing with vocal delay in your headset.
This isn’t the ideal way to start a session. The performer should feel completely at ease, and technical issues should have been addressed before recording. The audio interface should have been set for direct monitoring to avoid low latency monitoring or minimized latency.
8. Failing to Record Enough Takes
Avoid this mistake. In today’s age, DAWs offer so much convenience and flexibility. With loop recording and no need for tape, there’s no excuse for not recording the performer running through the song multiple times.
Loop recording allows for easy vocal editing. After recording multiple passes through each part of the song, you can easily edit and compile the best takes into one cohesive track. Without this approach, or with only one take, you limit your options, which isn’t in your best interest.
Having multiple options and being able to select the best parts will impress your client and showcase your skills. So, loop record multiple passes through each section of the song. Additionally, make one, two, or three full passes through the song for your finished tracking takes. Then, do your edits and ensure you have what you need.
9. Failing to Fix Before the Mix
I cannot stress enough the importance of not carrying problems into the future. Whether you’re in a hurry to leave or feeling frustrated with the artist, summon patience and maintain focus.
It’s a mistake to postpone fixes for later. Even though you may be tired and tempted to believe that everything can be fixed in the mix, it’s best to address issues promptly. Don’t procrastinate; fix whatever needs attention while the singer is still there with you.
Attempting to fix problems in the mix, only to realize they can’t be fixed, is counterproductive. Admitting defeat later on will only exacerbate the situation, leading to additional time and effort spent on re-tracking and blending performances.
Save yourself time, money, and scheduling headaches by addressing problems before mixing. It’s better to deal with issues immediately rather than letting them linger and create bigger problems down the line.
10. Making the Artist Loose Confidence
I come from a generation where mockery was often used as a motivator, but times have changed. Mockery may have pushed me to excel, but for newer generations, a gentler approach may be more effective.
Destroying a performer’s confidence is the last thing you want to do. It’s important to exercise patience and nurture talent. Your reputation and word of mouth will bring you more customers and opportunities, so being overly critical or difficult to please isn’t ideal.
Being hard on performers likely won’t work out in the long run. Instead, focus on helping them improve without making them feel inadequate.
For many people, being in the studio is a new and unfamiliar experience, and they may feel overwhelmed. As the person in charge, it’s your responsibility to make them comfortable and guide them through the process of delivering a great performance.
Encourage them without belittling them, and help them navigate the complexities of recording. Ultimately, do your best to create a supportive environment where artists can thrive.
In Conclusion
That’s the list of vocal recording mistakes to avoid. While there could be more issues to discuss, we’ve covered a lot already. Hopefully, you’ve gained some useful perspectives and insights that will help you in your work.
Remember, the goal is to avoid common mistakes and create successful recording sessions.
Now go and to get to it.
Good Luck!