
You may be thinking; If you want something done right, you have to do it yourself. Or, maybe you’re thinking about your limited budget. With a limited budget you can stretch what you are able to get done by doing it your self. No matter your motivation though, let’s discuss what essential music video equipment one might need to shoot a DIY Music Video.
With advancements in prosumer videography equipment the ability to make a cinematic video has increased. That means your ability to capture awesome footage to accompany your new music has never been greater. For a reasonably low cost one could rent or buy the equipment you need. That would ensure you’d be able to shoot something that delivers a base standard of quality. That means that you may not need to continue paying out to contract videographers. Instead you can use that budget to build your own gear locker.
Doing so can grow to become a significant advantage as the more you do collect the less you’ll need. Eventually you’ll have most everything essential to produce your own video. The best part is that you’ll pay once. You don’t need any cash for the equipment that you have already collected. From then on you can shoot what you want without incurring cost to contract others or buy more gear.
Before you get started you should be familiar with the some basic timetables. Here is timetable that we think we should mention first. How far in advance of the music video release should the music video be shot? To read more; Follow this link!
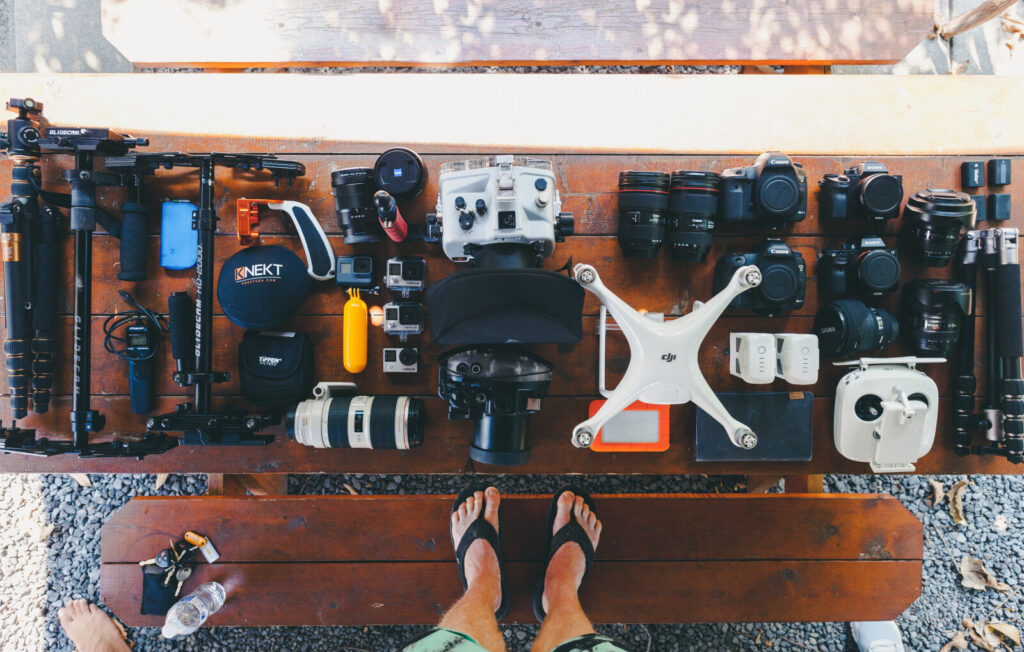
Collecting Gear
So purchase the important central pieces of gear, the most essential music video equipment first. Then if you need something out of the ordinary rent it. You can always use a rental services to pick up some random gear. Aside of that, you may still have some expense with dressing your set with props for the shoot. But the important equipment will be yours. Going forward that will give you a lot of flexibility to shoot what you want when you want to.
The Basic Music Video Gear List
- Camera
- Lenses
- Tripod
- Gimbal
- Batteries
- Memory Cards
- Lighting
- Blue tooth speaker
- Video Editing Software
After you do assemble your gear locker, and furnish it with all of the latest and greatest technology; You’ll have to shoot. Everything you do with your shoot and video release will revolve around timetables. For a better understanding of how long it should take you to shoot your music video. Read this!
For now though let’s get back to focusing filling your gear locker; starting with the “centerpiece”.
Camera
So in order to capture the performance you will need to have some sort of a camera. But, don’t let your budget keep you from getting to work, use what you have. You can easily begin to make progress as a budding videographer with a good cellphone camera.
That said though the camera is the tool that matters most. If you decide to build an equipment locker then it makes sense to start with the best quality camera you can afford. The other gear is secondary and you can build up your collection as you progress.
Using A Cellphone Camera
You can start by using your cellphone camera at the beginning. There are some APPs that allow you an advanced cinematic features that your cellphones camera APP will not. One such APP is called FILMIC PRO https://www.filmicpro.com/. It basically converts your phone into a higher end version of itself. It can’t change the specs of the cameras in your phone. But it can give you a lot more professional options. The APP change how you can interact with your phones camera. It can also change how you can collect and store footage, ie. frame rates and resolution rates and such.
Having a good cellphone and picking up an APP is a good idea. Especially if you are just getting started. When you are starting from scratch you are probably in over your head a little bit. So starting with a phone gives you more time to learn more about videography terminology and technique. You can upgrade later if it’s necessary.
Using A DSLR Or A Mirrorless
If you have a little bit of money set aside. If you want to use that money to create a music video. Then maybe using that money to pick up a decent quality DSLR or mirrorless camera could be a good idea.
Not only is a camera an essential piece of music video equipment; it is in fact the centerpiece of your video gear locker. You could build around that a little bit at time. Some of these cameras have tracking and stabilization features which lend to a better quality video recording.
In addition to that you can choose one that will shoot in a resolution that makes you happy. The best thing about shooting with cameras like these is the ability to change lenses.
While you can always purchase something new, you may think second hand. If you are a thrifty shopper like I am finding something second hand can feel like a score. If your purchase can still do the job while also providing you a savings it is. Purchasing second hand can help you stretch your budget. It is perfectly reasonable, and dare I say practical. So don’t be afraid to check your local second hand marketplace. When you find something you like be diligent to be sure it is in good working order.
The first step is finding a camera that seems like a reasonable solution. The second step is to search YouTube for a video about making music videos with that particular camera. If you don’t know a lot about cameras this will tell you what you need to know about the camera you’re considering.
Lenses
The great thing about shooting music videos with a DSLR or mirrorless camera is your ability to change lenses. That’s cool because a particular lens may allow you to create a certain mood. It can give your film a look that suits your vision for your video. You can pick up a different lens for the next shoot. Each one will lend you a different stylist way to capture video.
While you can certainly incur cost in building a collection of lenses for your camera. You may opt to buy the lenses that are most regularly usable or beneficial. If a lens is too expensive you could just opt to rent.
A Little Research
Do a little research before your next music video. Plan ahead about what you’ll need to get the look you are going for. That way you can make informed to decisions on how to source the lenses. This will help you to identify what is required for that particular shoot. Rentals coupled with a few purchased lenses can be a very economical approach. It gives you flexibility to capture what you need to now. Afterward you can move on to the next song. Solve the problems for that shoot, and produce the video content you need. For some help with how to make a good music video save this link; Good luck!
If you are going to use a cellphone camera to shoot there are accessories. One accessory is a clip on professional grade lens. I have purchased an anamorphic lens to clip to my cellphone’s camera before with great result. It may seem like a small item, but it may be an essential piece of music video equipment if you are going to use your cellphone camera. So even if you’re using your cellphone you can always make it more interesting. Spruce it up with some interesting clip-on lens for effect. Some manufactures even sell cellphone cases with locking mechanisms for the lenses they sell. Just be thoughtful of how far you go down this rabbit hole. At some point you may be better off jumping over to a DSLR or mirrorless. I went with the clip on so that when I changed the cellphone I could carry the lens along.
Stabilize With A Tripod

Having shaky video may be what is called for. In fact it may be that you are looking to convey some frantic or frenetic energy to your viewers. Shooting the video with your bare hands could be an effective means of producing that desired effect.
But shaky video won’t always be the most desirable result. In fact it may seldom be what you are looking for. So when your want your video footage stable and locked on to a target the solution is a Tripod.
Tripods, like anything else come at varying costs. With their multi-functionality, they are an essential piece of music video equipment to help you achieve certain goals for your shoot. Again like anything else buy the best quality you can afford and don’t look back. When you have income coming in later you can upgrade. The items that you no longer intend to use can be sold. The circle of life.
Do be sure to select a tripod that is rated to carry the weight of your camera and lens. If you don’t you may be watching a live action horror movie. Nothing so terrible as the expensive camera and lens crashing into the concrete floor because the tripod was garbage.
Upgrade To A Gimbal
Having a gimbal gives you the ability to upgrade the look of your production. It makes for smooth and stabilized motion shots that are very cinematic. The shots can be perceived as if the camera is gliding through the action. A prosumer gimbal in conjunction with your DSLR, mirrorless or cellphone camera can give you what you need. You’ll have the ability to capture those fluid cinematic shots that you see on tv or travel vlogs online.
Again be sure to buy from a reputable manufacturer. Be sure to determine that the gimbal you choose is rated to carry the weight of the camera and lens you’ll use. You don’t want to overburden the motor on the gimbal or you may burn it out.
Achieving these cinematic shots can easily be done with the cellphone gimbal. If you are limited to using your cellphone you should pick one of these gimbals up. The fluidity of the shots lend to the illusion that you are using much more expensive equipment.
A gimbal may not be an immediate essential. But, it is one of the first best uprgrades you can make. It yields substantial results. Gimbals for the DSLR and mirrorless cameras are a bit more expensive than their cellphone counterparts. So If you can, get started there.
Batteries And Memory Cards
Having extra batteries and sufficient storage is a must for any shoot. You don’t want to have no extra batteries or memory cards on the day of your shoot. Certainly not with locked set locations and talent. So be sure to have plenty of extras charged and on hand. That way you can maximize your time and focus on capturing content. It elements unnecessary chaos.
In addition to having plenty of batteries make sure you have plenty of media storage on hand. Make sure you have enough to capture all of the content that you have scheduled. Then make sure you have extra memory cards and hard drives in case anything goes awry.
Lighting
So we’ve finished with the camera and other useful accessories. Now let’s focus on lighting. Controlling lighting is an essential and having some pieces that are mobile and versatile is essential.
You may not have lighting kit at the beginning. If so you may be able to get some of the shots using natural lighting. There are particular times of day when the natural light is best. There are easy to use apps that help you track when the sun position. That will help you to know the best time for your shots. You can download one of those apps first and use it as a reference.
Entry level lighting equipment is affordable. It can be purchased online as a kit. After you have your camera and lens sorted it is probably the next purchase that you should make.
Bluetooth Speaker
In order for you or the other artists to perform the music for the video you’ll need sound. That sound is so they can coordinate their physical performance and timing with their cues in the original song. You will need the stereo two track single to be used as the main audio for the video. It should be played allowed during the shoot.
The simplest way to achieve this would be to carry a portable bluetooth speaker to your shoot. You can connect a cellphone to the speaker and play the stereo track through the bluetooth speaker. A bluetooth speaker may not seem like an essential piece of music video equipment but it will help you and any actors to follow along to and coordinate their cues with.
Video Editing Software
After you have captured all of your footage you will need to select a video editing software. From their you will import the stereo audio track of the song and the video footage to edit. Most of the main Software Choices will provide you with comparable tools for editing and effects. Do some research into which may be right for you. YouTube Creators are great for demonstrating each of these different softwares. That may be the best place to see how each editor stands up against the other. So we recommend that you start with a search there.
Once you have that sorted, You’ll have to start thinking about casting. You may need more insight into casting for your music video. If so we’ve recently published a great article that will help detail everything that you’ll need to consider. Check it out!
In Conclusion
When you finally have all of your essential music video equipment and you are ready to start shooting there is still one more thing. That last thing you’ll need is an idea. We have a great guide to conceptualizing and writing a treatment for your music video. You should bookmark it as a resource. It is linked here!
It is a big effort getting everything together. Collecting gear takes time. But if you can, it will certainly be in your advantage to have done so. Keep in mind that most of this gear is resell-able. If you buy something that doesn’t end up being useful just re-sell it. Going down the path of DIY music video production. is a big commitment. But it can be great fun. So, remember to keep your head up, stay focused and drive forward.
One last thing. We recently posted a Music Video Checklist for artists attempting to shoot their own MV. It is a very useful tool that is free, you save and bookmark and use it for each shoot. Until you’ve memorized it. Get it here!
Whatever you decide to do, we certainly wish you the best in your effort. Remember not to loose track of the deriving joy from traversing the challenge. As they say life is a journey not a destination. Good luck!