
Welcome to the ultimate guide on how to Make Your Music Videos Alone. Are you an independent musician tired of waiting for your big break? Want to create a music video that showcases your talents but can’t afford a fancy film crew? Well, With just a little bit of creativity and a lot of elbow grease, you can make a music video all on your own.
In this article, we’re going to dive deep into the nitty-gritty of creating a music video by yourself. We’ll cover everything from pre-production to post-production and give you tips and tricks for achieving that cinematic look without breaking the bank. And the best part? You won’t have to worry about sharing your spotlight with anyone else.
So, let’s start with the big question: How can independent musicians create a music video all by themselves?
With resourceful planning, some decent equipment, and a lot of determination. We’ll show you how to develop a concept, storyboard your ideas, choose locations, and create a shot list. We’ll also talk about the equipment you need to film and edit your video, and give you tips for achieving that cinematic look with basic gear.
But that’s not all! We’ll also cover techniques for filming alone, managing your workload, and syncing audio with video. And once you’ve captured your footage, we’ll show you how to edit it like a pro, with tips for color grading, adding effects, and creating a compelling visual story. All of this so you can maximize the quality of your production and get the most out of your time and effort..
Once you are confident with making videos for yourself, You could consider making one for every new song you release. Here is a link to a great article about why you might want to: Have a read!
So, If you’re ready to make your music videos alone? Let’s get started!
Pre Production
Alright, it’s time to get down to business. Before you even pick up your camera, you need to do some serious planning and preparation. I know planning may not be the funnest thing ever invented. But trust me, it’s worth it. Without a solid plan, your music video could devolve into a chaotic mess, and while that may be awesome and hilarious for your frenemies, You probably wouldn’t be laughing. So, let’s dive into the importance of pre-production.
First and foremost, you need to develop a concept and storyboard for your video. What’s the story you want to tell? What’s the mood you want to create? Dramatic, funny, or a blend of both? These are all essential questions to consider. Once you have a concept in mind, it’s time to storyboard it out. Think of it as a comic strip that maps out each shot, including camera angles, movements, and special effects. It’s like a roadmap for your video, keeping you organized and focused during filming.
Here is a link to a checklist for your Music Video productions. You should read it and book mark it for your advantage!
Getting Some Gear
While you can certainly start with just your trusty phone, consider investing in that entry-level drone with tracking and a motorized gimbal as soon as possible. These tools can take your videos to new heights (literally) and make them look like a million bucks. Having them in your aresonal can give your video that professional cinematic feel. Additionally as these tools can operate for you robotically, You’ll be able to make your music videos alone in ways that you wouldn’t otherwise.
And hey, they won’t break the bank either. While these tools are certainly not free they’re probably not as expensive as you might think. Think of it as a worthwhile investment in creating that illusion of a big-budget production, if you’re in it for the long haul, and intend to make your music videos alone regularly, then you may want to take it up a notch.
This guide will help you to better prioritize what gear you need when. Rather than just these two paragraphs here, This entire article is focused on specifically that. Check it out!
Create a Shot List
With your gear sorted, it’s time to create a shot list and choose locations. Your storyboard will come in handy here. The shot list should include every shot needed to tell your story, along with details about camera angles, movements, and any special effects. Think of it as a checklist to keep you on track during filming. As for locations, pick places that fit your concept and help convey your story. Whether it’s your backyard or a rented warehouse, ensure you have proper permissions and that the location aligns with your vision.
Creative Ideas
There are plenty of fun and creative ideas you can explore for your music video. If you’re all about showcasing your performance skills, set up a simple stage or backdrop and let yourself shine. Play with different camera angles, close-ups, and wide shots to keep things visually interesting.
If you want to include a storytelling element, create a narrative that complements your song. Plan out scenes and actions that you can perform solo, and let your imagination run wild.
By doing the homework first and working through pre-production process in advance you’ll be positioned to produce music videos that will leave your audience begging for an encore.
With a solid plan in place, you’ll be ready to make your music videos alone with confidence.
Filming
Making music videos alone can be a challenge, but with a bit of planning and resourcefulness, you can overcome it. Manage your workload effectively by breaking down your video into smaller scenes or segments. This way, you can focus on capturing each part with precision and attention to detail.Let’s explore some tips and techniques that will help you capture cinematic shots and bring your vision to life.
Create the Mood
When it comes to setting up your equipment and lighting, attention to detail is key. Ensure that your camera is properly mounted on a stable tripod to avoid shaky footage. Take the time to experiment with different lighting setups to create the desired mood and atmosphere for each scene. Whether it’s using natural light, studio lighting, or a combination of both, find the perfect balance that enhances the visual impact of your video.
A Camera and Tripod
With just a camera and a tripod, you can still create impressive shots for your music video. Consider capturing steady wide shots that showcase your performance in its entirety, close-ups that highlight your emotions and expressions and creative angles to bring a unique perspective to your visuals. Experiment with different framing techniques and camera positions to enhance the visual storytelling of your music video.
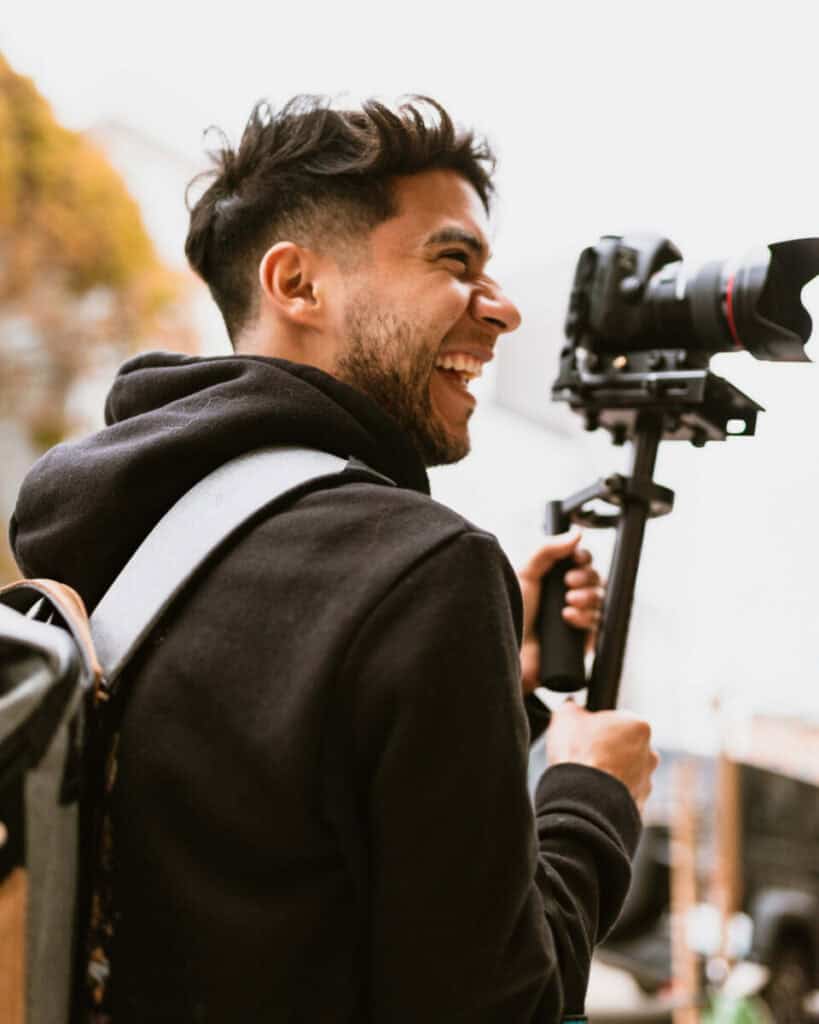
Get a Gimbal
With a gimbal that has robotic tracking capabilities, you have a range of creative possibilities to capture engaging shots and all of that will go along way If you have to film your own performance
Here are some ideas: These ingenious tools allow for smooth and controlled camera movements, adding a professional touch to your video.
- Smooth tracking shots: With the motorized gimbal, you can achieve smooth and stable tracking shots while moving around. This is great for showcasing your surroundings as you navigate through different locations. Imagine gliding effortlessly through a park.
- Pan shots: Use the gimbal to capture smooth panning shots, where the camera moves horizontally from one side to another. This can add a sense of movement and cinematic flair to your video. Consider using this technique to capture the environment around you or to emphasize certain elements within the frame.
- Low-angle shots: Get creative by using the gimbal to capture low-angle shots. Place the camera near the ground and tilt it upward, capturing dramatic and unique perspectives. This technique can add a sense of grandeur or intensity to your video, making it visually captivating.
- Follow shots: Utilize the gimbal’s tracking capabilities to capture dynamic follow shots. Whether you’re walking, running, or even performing, the gimbal can keep the camera focused on you while maintaining stability. This technique is great for adding energy and immersion to your music video.
- Point-of-view (POV) shots: Hold the gimbal in hand and film yourself as you walk and where you are walking to give a firsthand perspective. This technique can create a more intimate and immersive experience, allowing your audience to feel like they’re right there with you during the performance.
Remember to experiment with different angles, movements, and locations to create visual variety and keep your viewers engaged. The motorized gimbal with tracking capabilities opens up a range of possibilities for capturing professional-looking shots that will elevate the overall quality of your music video.
Here is a great video to give you some tips for your gimbal:
Get a Drone
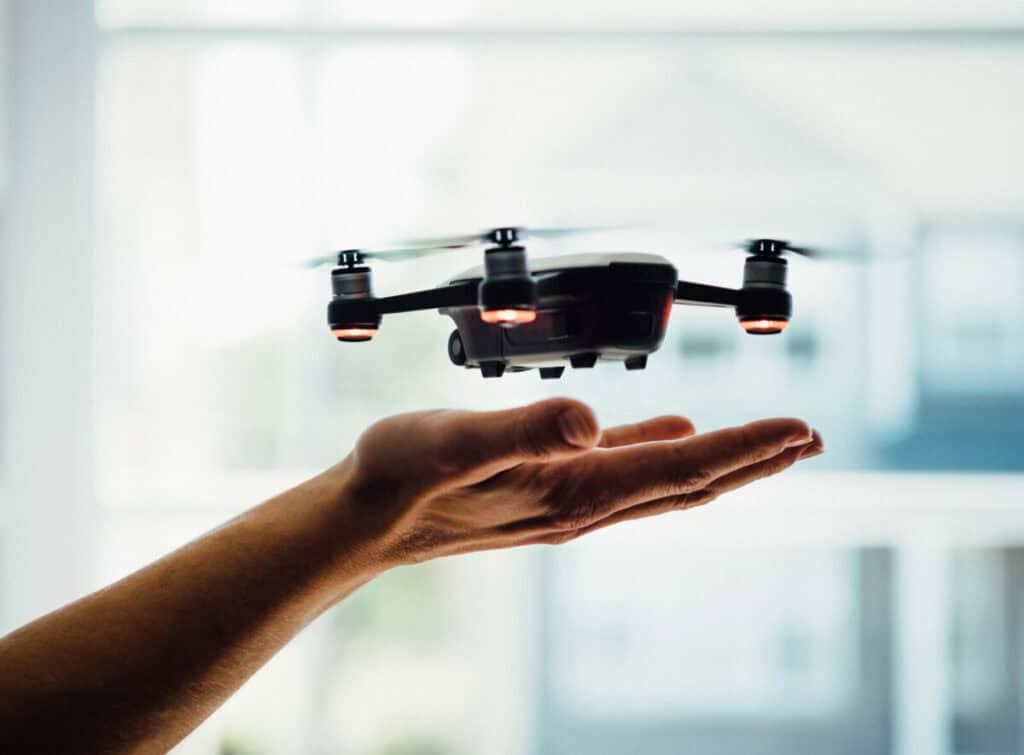
Additionally, drones with tracking capabilities can offer unique perspectives and breathtaking aerial shots. Explore the possibilities they provide and experiment with different angles and movements to create captivating visuals.
- Aerial Establishing Shot: Begin your music video with a breathtaking aerial shot that sets the scene and captures the location or environment where you’ll be performing. This shot can provide a grand introduction to your video and create a sense of scale.
- Orbit Shot: Use the drone to circle around yourself while you perform, creating a captivating orbit shot. This shot adds a dynamic and cinematic feel to your video, allowing the viewer to observe you from different angles and perspectives.
- Flyover Shot: Showcase your performance from above with a flyover shot. Have the drone ascend and fly directly over you while you sing or play your instrument. This shot can provide a unique and immersive perspective, highlighting your presence and capturing the energy of your performance.
- Tracking Shot: Utilize the drone’s tracking capabilities to follow your movements as you perform. Whether you’re walking, dancing, or engaging in any other activity, the drone can autonomously track you, capturing smooth and fluid shots that showcase your performance from various angles.
- Revealing Shot: Start with a close-up shot of yourself, and as the drone ascends, reveal the wider surroundings or an impressive backdrop. This shot can add a sense of awe and anticipation, gradually unveiling the context in which you’re performing.
- Top-Down Shot: Have the drone hover directly above you while you perform, capturing a unique top-down perspective. This shot offers a bird’s-eye view of your performance, highlighting your movements and providing a visually striking angle.
Remember to prioritize safety and follow local regulations when operating a drone. Always ensure you have enough space and clear visibility to fly safely. By incorporating these drone shots into your music video, you can create visually stunning and engaging content that captures the attention of your audience.
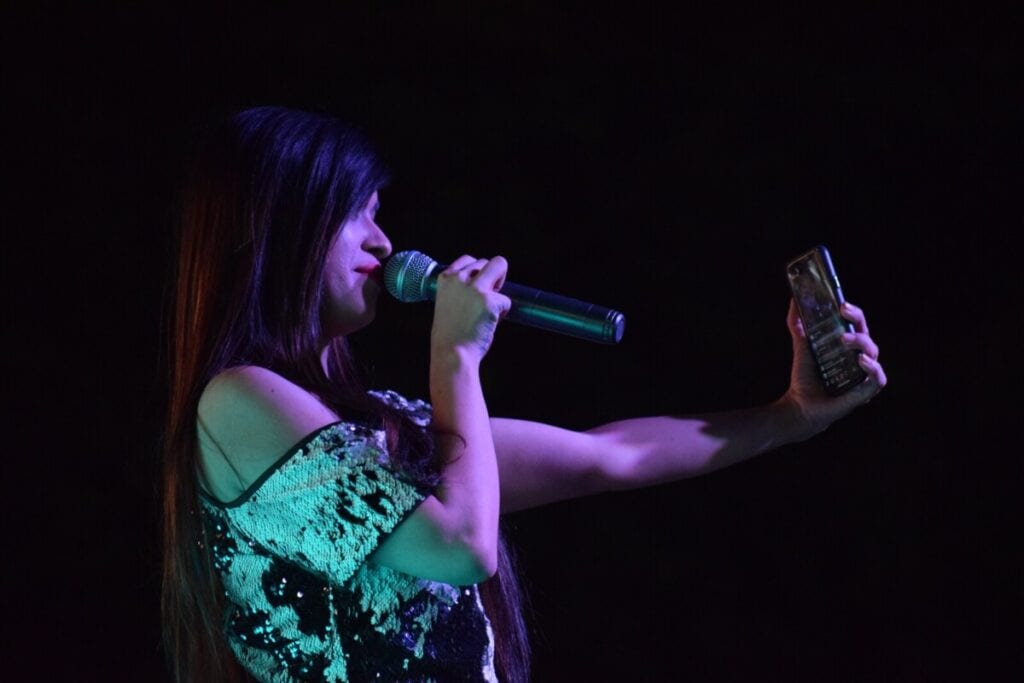
Synching Audio with Video Performance
To ensure that your performance matches your recording, come prepared by bringing a portable speaker or a radio to the set. Play the recorded audio while filming and sing along to synchronize your lip movements with the vocals on the audio recording. While it may take a few attempts to get it right, with practice, you’ll start to produce convincing performances that seamlessly align with the music.
In addition to these tips, there are a few best practices that can elevate the quality of your footage. Pay attention to framing and composition. Ensure that each shot is visually pleasing and tells a story. Experiment with different angles, perspectives, and depth of field to add depth and visual interest. Remember, post-production editing can also enhance your footage, so don’t worry if everything doesn’t look perfect during filming. You can refine and polish your video in the editing process.
So, as you set out to make music videos alone , keep these tips and techniques in mind. They are both a foundation and a starting point. Over time you will learn to incorporate them into whatever you’re doing intuitively. So don’t waste a lot of time having uncertainty keep you motionless, you’ll learn as you go. Now get going!
Editing
Editing is where the magic happens and your raw footage transforms into a polished music video that will leave your fans in awe. So, let’s break it down and explore the key aspects of the editing process.
First things first, you need to choose the right software for the job. There are various editing software options available, ranging from beginner-friendly to professional-grade. Find one that suits your needs and budget, and get familiar with its features and capabilities.
Once you have your software ready, it’s time to organize and review your footage. Import all your video clips, audio tracks, and any additional assets into your editing software. Create a structured system for organizing your files, such as using folders or bins to categorize different elements. Take the time to review each clip, identifying the best takes and selecting the moments that capture the essence of your music.
Experiment with different editing techniques like cutting on the beat, using transitions to create smooth transitions between shots, and incorporating visual effects to enhance certain moments. Play around with pacing, rhythm, and timing to create an engaging and dynamic flow that complements the music and relays a compelling visual story
Color grading involves adjusting the colors and tones of your footage to achieve a desired visual style or mood. It allows you to enhance the overall look of your video, create consistency across different shots, and evoke specific emotions. Use color grading tools in your editing software to manipulate brightness, contrast, saturation, and color balance. Explore different color palettes and grading presets to find the right aesthetic for your music video.
Effects can range from subtle enhancements to more extravagant visual elements. Experiment with effects like transitions, overlays, text animations, and even visual filters to add flair and creativity to your video. Just remember, moderation is key. Use effects sparingly and purposefully, ensuring they enhance the storytelling and don’t overshadow the music itself.
In a nutshell, editing is where you bring all the elements together and create a visually captivating music video. With practice and a touch of creative tenacity, you’ll have your edits looking pro quality in no time.
Here is a great video to give you some tips for your drone:
In Conclusion
Congratulations on completing your video! But before you dive into working on your release strategy and promotions, take a moment to reflect on just how far you’ve come. Now that you know you can make music videos alone let that be the fuel for the challenges that lie ahead.
Trust your instincts and let your passion guide you. Remember, it’s okay to start small and learn as you go. With each video, you’ll grow as a musician and a visual storyteller.
Here is a link to a guide that focuses on how to effectively manage the release of your new video. You put so much effort into getting this far; You certainly wouldn’t want to drop the ball now. Read more here!
So, embrace the freedom to experiment and explore your creativity through video production. Use it as a platform to express yourself, tell stories, and connect with your audience on a deeper level. Don’t be afraid to take risks and try new things. And most importantly, if everyone else is busy, don’t hesitate to try doing it all by yourself. The possibilities are endless.
Best of luck as you embark on this exciting journey. Keep creating, keep pushing boundaries, and never stop doing. The world is always looking for special people who never stop, so be one.